The Sinewave Cycles Reactor is a generator-powered USB charging device that enables riders to charge and power a wide range of devices. As more cyclists are using electronics for ride tracking, navigation and communication the need for a reliable off-the-grid power source has grown. Several similar products are on the market aiming to fill the niche, including Sinewave’s well-received Revolution charger. The Reactor translates the best features of the Revolution into a clean, elegant, well-integrated unit that should have strong appeal for bicycle travellers, commuters or anyone who wants to become a bit more self-sufficient by putting their pedal power to additional use. I received one of the first Reactors off the production line in May 2014 and had the opportunity to put it through its paces at the recent Oregon Outback ride. I’ll offer more of my thoughts on the performance of the unit later but thought that a step-by-step installation guide might be useful for folks considering purchasing and installing a Reactor. The process is relatively simple, doesn’t require much in the way of specialty tools and shouldn’t present much difficulty for most home mechanics. Of course, if you want something done right and don’t have the time, patience, tools or skills for the job it is always best to leave it to a professional. Assuming you want to do this yourself, there are a few things to consider first.
- Do you have a generator hub installed? The Reactor won’t do you much good without the hub to power it.
- Do you have a threadless steerer tube? The Reactor fits 1″ or 1-1/8″ threadless steerer tubes but is not compatible with threaded steerer tubes and quill stems.
- Does your steerer tube have an opening at the bottom? Most metal forks and suspension forks do. Many carbon forks do not. If your steerer isn’t open all the way through the fork crown you won’t be able to run the wires to the hub.
Assuming your bike meets the basic prerequisites, you’ve ordered and received your shiny new Reactor and are ready to get busy, let’s begin. Here’s the box you’ll get when you order your Reactor: 
Crack it open and here’s what you see. Kudos to Sinewave for clean, simple, low-waste packaging.
Here’s the Reactor itself. Pretty slick and sleek with Magpie-approved shininess. 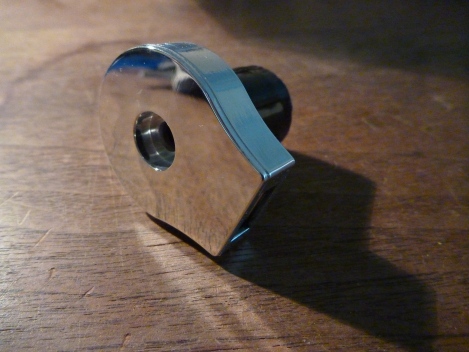
On the bottom of the head unit are two sockets for connecting the wiring harness and the pass-through hole for the headset preload bolt.
Here’s everything that comes in the package. Head unit, wiring harness, wooden dowel, extra-long headset preload bolt and a nut.  So you’ve got your Reactor and you’re ready to install it into your bike. Sinewave Cycles provides installation instructions on their website, so having those printed out or on a nearby screen for easy reference is a good idea. Read those over before you get started and be sure everything makes sense. If you’re unsure about what you’re doing, I highly recommend leaving the job to a professional mechanic with experience in hub dynamo work. If you are ready to do the job yourself, let’s get some tools together. For most installs, you won’t need much in the way of specialty tools. Here are the tools I used to install the Reactor on my bike with a metal steerer tube and Shimano DH-3N80 hub. Necessary tools may vary for different hubs and carbon steerer tubes.
- Hex wrenches in appropriate sizes
- Hammer
- Diagonal Cutters
- Needlenose Pliers
- Small Flashlight
- Wire Cutter/Stripper
- Shrink-wrap tubing
- Heat Gun
- Zip Ties
- Fingernail Clippers
- Coffee
 Okay, you have your tools all ready to go. Let’s get into it! Clamp your bike securely into your workstand if you have one and remove your front wheel. Sinewave recommends removal of your fork as well. This may make installation easier for some users but I chose to keep the fork on the bike to save some time and simplify things. First, locate the top cap of your headset and grab the appropriate hex wrench to loosen it. Most will use a 5mm.
 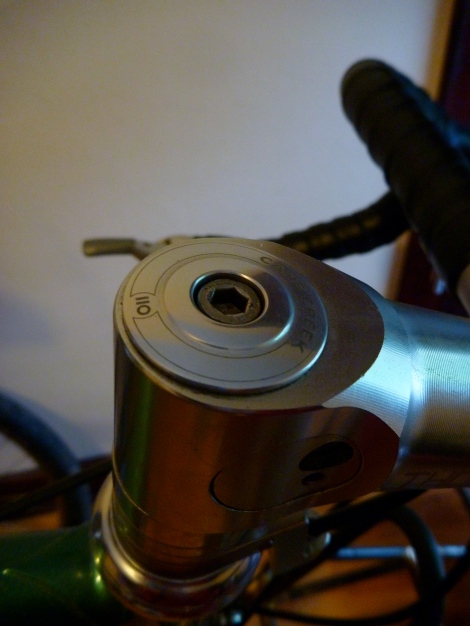 Loosen the bolt…
 and remove the top cap. If you’re not removing the fork from the bike, keep your stem clamped to the steerer to prevent the fork from dropping out.
  Use your flashlight if needed and take a peek at your star nut. The wiring harness will need to pass through here one way or another. You may need to drill or otherwise alter the star nut, split the wires apart (as described in Sinewave’s instructions) or replace it with a special star nut designed to allow cables to pass through. Use caution when performing any alterations to avoid damage to your steerer tube and ensure integrity of the star nut. Carbon steerers with an expander plug for headset preload may create other challenges not described herein. Consult your local bike shop. Fortunately, the spaces between the flanges on my star nut were wide enough and aligned in such a way that the wire would be able pass through with only minimal fuss.
  Once you are sure the wires will pass through your star nut, it is time to press it deeper into the steerer to make room for the Reactor. There are shop-quality tools designed specifically for this purpose but the included hardware works fine if used carefully. Thread the included nut onto the extra-long bolt as far as it will go. Thread the bolt into your star nut until it stops and snug it down finger-tight.
 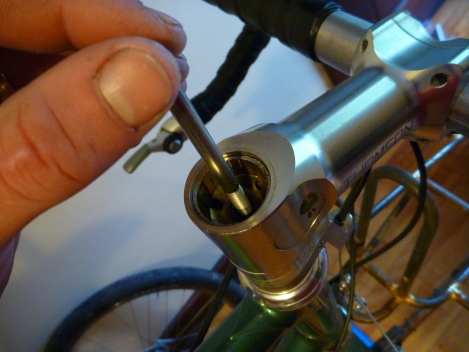 Grab your hammer and gently tap the bolt down into your steerer while holding it between your thumb and forefinger.
 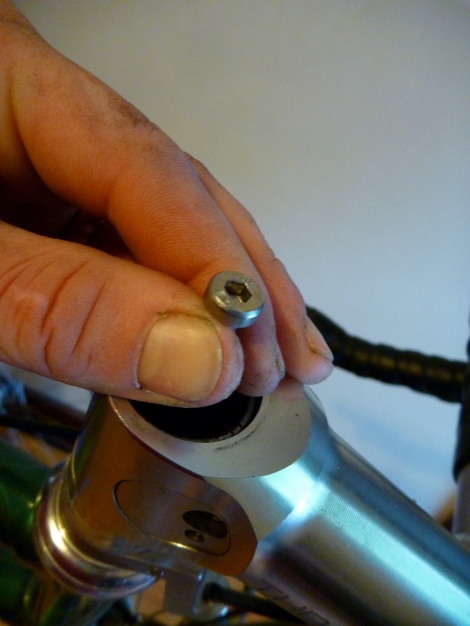 You’ll want to go slowly here and be sure the star nut stays straight in the steerer and doesn’t go down too far. If you screw this up you’ll have to install a new star nut and will have a heck of time getting the bad one out, so be careful.
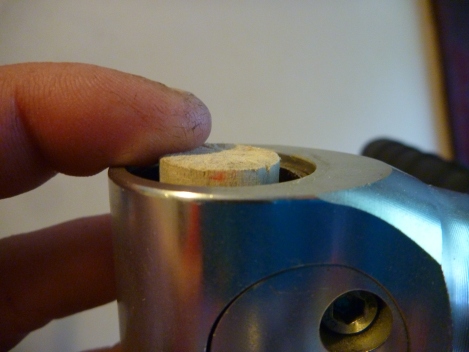
 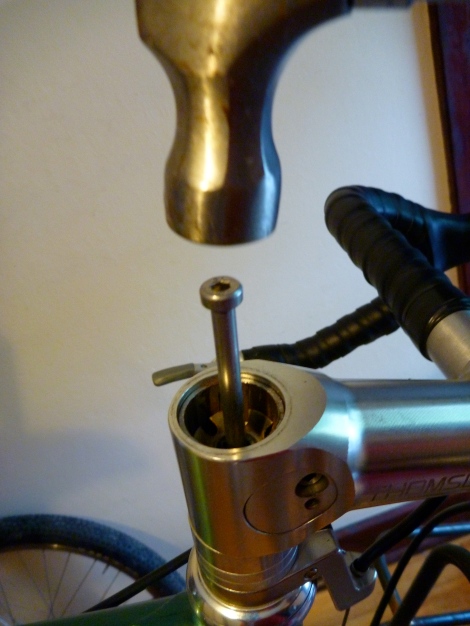 To check the depth of your star nut, use the included 45mm wooden dowel or a small ruler or measuring tape. The dowel should be flush or just above the top of your steerer. I still have a little way to go in the below picture:
 To double check the star nut depth, drop the Reactor head unit into your steerer, install the bolt through the central pass-through hole and try to snug it down. If the bolt bottoms out and the Reactor is able to move vertically, you’ll need to set the star nut a little deeper. I have a little over a millimeter to go here:
 After a couple more gentle taps, the head unit snugs up nicely.
  Once you’re feeling good about the depth of your star nut it is time to install the wires.
  Wiggle the wires through one of the gaps (or two adjacent gaps if you had to split the wires) and gently slide them down into the steerer.
  Take a peek under your fork crown as you feed the wires in from above and watch for the ends starting to poke out. This will be a simple matter for forks with open steerers. The fender eyelet under my crown made things a little tighter but the wires popped their heads out right where they needed to be.
  Use your needlenose pliers or strong tweezers if needed to fish the wires out and pull from the bottom as you continue to feed from above.
  Keep pulling and feeding until the wire is fully inserted into the steerer, all the way up to the band of insulation below the connectors.
  The wire is long enough to reach the hub even with extra-long steerer tubes and/or suspension forks, so now you have to decide what to do with the extra wire.
  One option is to stuff the excess back up into the steerer. This can be a good idea if you foresee moving the Reactor to another bike as you won’t be limited by a shortened wire. However, it may be difficult to secure the loops of wire so they don’t rattle, fall out or look a mess. Since I plan to leave the Reactor on this bike permanently, I elected to shorten the wire to an appropriate length for my bike. Once you’ve decided what to do with the extra wire, you’ll want to secure it to the fork with your zip ties. Be sure the wire won’t interfere with your wheel, brake or other moving parts. Don’t fully tighten or clip the zip-ties just yet. You will need to adjust the wire position as you go along. As I already had a lighting wire running to my hub and the guides on my fork weren’t large enough to accommodate both wires, I secured the Reactor wire to the fork crown, top of the fork leg and then my existing lighting wire.
  Now it is time to connect the Reactor wire to your hub dynamo. Your process may vary here depending on your brand of hub. Consult an experienced mechanic or your hub maker if you have questions. My Shimano hub has a small plastic connector to attach the wires to the hub.
  On the backside of the connector is a little tab that holds the black and gray parts together. Use a small screwdriver, hex wrench or other appropriately-sized poker to gently press this tab and slide the two halves of the connector apart.
 Be gentle when pressing the little tab as it is easy to break off. Slide the halves apart and this is what you’ll be left with:
 Pull the existing wires out of the connector if you already have a device installed into your dynamo.
 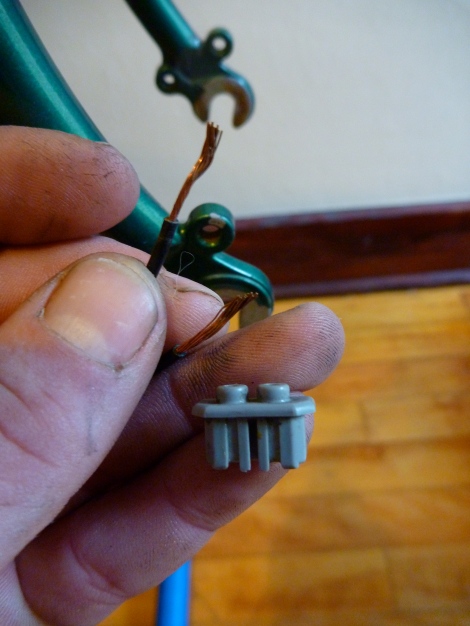 If you’ll be trimming the excess from the Reactor wires, you’ll want to line them up at this point to be sure you have enough wire to prevent the ends from pulling when installed onto the hub. Double-check that the wire is positioned safely out of the way of your wheel, brakes, or other moving parts before you trim. I used my existing lighting wires as a guide.
 Use your wire cutters or sharp diagonal cutters to trim the wire. Measure twice!
  Now you’ll need to strip the insulation from the ends of the wires to connect them to the hub. Shimano recommends stripping 16mm of insulation for their connector but a little extra can’t hurt. Again, I used my existing wires as a guide.
  If you haven’t already, pull two or three inches of the two halves of the wire apart.
 Double-check the length of insulation you’ll be stripping off.
 Use your wire strippers (or a sharp blade) to carefully cut the insulation without damaging the copper wire inside.
 Gently slide the insulation off the wire, exposing the copper core.
  If you’re installing the Reactor in tandem with another device, you’ll need to connect both sets of wires to the hub. The easiest way to do this is to simply twist them together.
  To add security and prevent the wires from pulling apart, I added short lengths of shrink-wrap tubing to hold them together. Electrical tape or zip ties could do the job in a pinch.
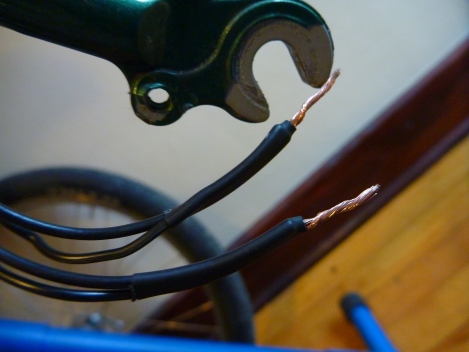 Now you’ll need to reinstall your wires into the hub connector. Depending on the thickness of your wires, you may have to alter the hub connector so they’re able to pass through. A small metal awl did the trick for me. A very small drill bit would also do the job. Be sure the tips of the individual strands of wire are twisted tightly together so they don’t snag when pushing through the connector’s holes.
  Then, curve the ends of the wire into the grooves on the outside of the connector. I had to trim a bit of the shrink tubing pictured above to ensure my wires were long enough wrap fully.
 When your wires are pulled through securely and wrapped over, slide the black covering over the connector until the tab clicks into place. If the fit feels excessively tight, you may need to slide the black cover off and be sure the wires are laying neatly in the two grooves in the gray connector. Don’t force it.
  Now that you have the wires installed into your hub connector, you’re ready to attach the head unit. Simply plug the connectors into the sockets in the bottom of the Reactor. There is no polarity, so either orientation works.
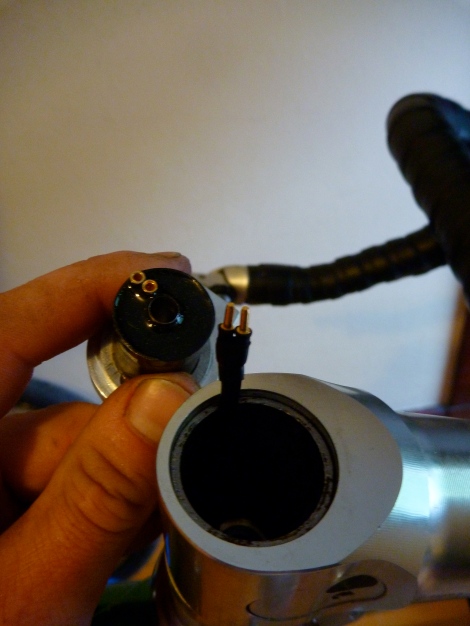 Once you’re all plugged in you can lower the head unit into your steerer.
  Carefully insert the head unit into the steerer to avoid pinching the wire. A gentle twist helps. Put a dab of grease on the threads of the extra-long preload bolt and install it though the head unit, using care not to pinch the wires. Gently thread it into the star nut and snug it down. REMEMBER: this bolt is not a fastener. You don’t need to torque it like a stem bolt. If you’ve left your stem and fork installed, you only need to tighten the bolt enough to hold the Reactor in place. If you’ve removed and reinstalled the fork, you’ll need to use it to preload your headset as well. Ask your mechanic or refer to your headset manufacturer’s recommendations if in doubt. Overtightening this bolt would be the easiest way to destroy your brand-new Reactor before you ever even get to use it, so be gentle and use care.
  You’ve done it! Now go back down your fork to adjust the positioning of the wire and be sure it is fully secured out of the way of your wheel, brakes, etc. before pulling the zip-ties tight and trimming them neatly with your fingernail clippers. You can also adjust the orientation of the USB outlet in whatever direction works best for your needs. Your bicycle is now a rolling power plant. Nice work!
  Now go for a bike ride, plug in your device and enjoy charging your electronics with the power of your pedaling!
 Look for a report on my field-testing of the Reactor on the Oregon Outback in the next few days. Was this tutorial helpful? Feel free to leave your feedback or personal experiences in the comments below. Thanks for reading and following along!

That was very thorough! Should be shipped with the Reactor as a guide. How was your experience with it? What in particular were you charging with it? I was looking at The Plug, but the size of this is more appealing. Thanks!
Dan
Dan,
Thanks for the comment! My experience with the Reactor on the Outback and afterward has been excellent and trouble-free. I’ve used it to charge my Garmin Edge 500 and my not-so-smartphone. I’ll be posting a more complete review very soon after I’ve been able to really put the Reactor through its paces.
-Ryan
Thanks for this Ryan. If and when I finally get one (on order, I think), I will be using this post as a guide!
Hermit,
Thanks for the comment; I’m glad to be of service! I’m sure you’ll have no problem with the install. It really is very straightforward. I’m also interested to see what you think of the Reactor compared to all the other charging devices you’ve used. Keep me in the loop (or circuit…)!
-Ryan
Can you charge your Edge 500 while running? I’d been led to believe it won’t do this.
Andy,
Thanks for pointing out this issue. As I understand it (and I’m no electronics whiz) the Edge 500 goes into “data transfer mode” when connected to most standard USB charging cables and functions as an external data storage device rather than a GPS unit. It has something to do with the number and arrangement of the pins in the USB connector. After reading forums on this topic on Garmin’s site and bikepacking.net I was referred to Gomadic’s special USB cable as a solution. While 18 bucks plus shipping seems like a lot for a USB cable I can confirm that it works like a charm. The display shows a charging icon when turned to the menu screen and gives an “external power lost” message when the hub stops delivering juice. Thanks again for the comment!
-Ryan
Thanks for this. As an aside, does anyone know if other Garmin head units will charge while in use?
Pingback: The Rigid Bicycle Fork and Its Many Parts | the quiet bicycle mechanic·
In reply to Andy Drummond’s question about other Garmin head units: Garmin 810 (and I’m pretty sure 800) will definitely charge while in use, without a special USB cable.
Pingback: The Often Overlooked Headset | the quiet bicycle mechanic·
Any other Edge 800 owners using the Reactor or Revolution to charge?
I have the Reactor and I’ve verified that it charges the 800 no problem. However, I’m curious if anyone has found a way to stop the 800 from showing the “external power lost” message. I can turn off the audible beeps, but I can’t find a way to turn off the screen message.
My concern is that any typical slow MTB climb (especially steep singletrack and/or hike-a-bike) won’t consistently provide sufficient dynamo power, and I’ll be forever having to touch the “OK” icon on the “external power lost” message.
I have been told to buy and otg cable, but I can’t find any with the correct mini usb that the garmin 800 uses – bloody annoying, why can’t garmin fix it !
Tom,
The Bike Hermit’s suggestion would certainly be one solution to the problem you describe. My preferred solution is to charge my devices on flat or downhill segments and unplug on the climbs. That way I don’t have the Garmin reminding me how slow I’m going and save a watt or two. If you keep it topped up when speeds are more favorable you’d be highly unlikely to drain the battery over the course of a climb unless you’re crawling uphill for many hours (in which case I pity you).
Pingback: Ladda din via USB samtidigt som du cyklar |·
Tom, I think that’s a function of any dynamo charger. Maybe you could use the Reactor to charge a cache battery with which you then charge the GPS device.
hello Ryan, what are the long term experiences? looked for the review but could not find it. thanks! best S.
Stefan,
My apologies for your fruitless search! Life and work make it hard to create the time for blogging and I haven’t gotten around to penning the review! Briefly, my long-term experience has been excellent. I’ve had no problems, failures or negative issues with the Reactor despite plenty of abuse and exposure to the elements. I don’t have a smartphone so I can’t speak to its performance with those devices but it has charged my phone, lights, Garmin and other devices without a fuss.
I’ll admit that the B&M Luxos IQ2 is a better value (especially since it incorporates a cache battery for steadier charging) than the Reactor plus a separate headlight but you can’t beat the clean integration of the Reactor. Despite its performance, I find the chunky, plastic-y aesthetics of the Luxos pretty unappealing. A Reactor and Schmidt Edelux pairing might just be the sleekest, sexiest light and charger combo available, either in black or silver.
I hope this brief overview helps. Feel free to comment or email if you have any specific questions.
Cheers,
Ryan
thanks very much Ryan! did you ever charge a battery pack with the Reactor?
If you don’t want to spend money on an expensive cable you can make one yourself. There’s some details at the following link. http://andy-matthews.co.uk/blog/2015/05/23/using-a-garmin-edge-for-audax/
It costs much less if you’re ok using a soldering iron, or even just twisting the wires together works.
Hi Ryan
I noticed that it doesn’t have any cover to protect the usb from rain. How it’s on rain especially when the plug hole is towards riding?
Thanks Walt
Ryan, excellent article! I’m contemplating purchasing the Reactor from the Bike Hermit, your comments about its performance in action are particularly helpful. Also looking at the Plug but from what I can tell the Reactor is a better design. Can you confirm that the Reactor continues charging on a fast downhill? Apparently the Plug goes into overvoltage protection and ceases charging. Incidentally, I’m with you regarding the IQ2– I think the Reactor paired with the Schmidt Edelux II is by far the cleanest and most efficient setup. I’m dumping my Garmin GPS in favor of a cell phone w/ GPS, in part because experiences commented about on this thread, and I really don’t need or want a cache battery. Or the extra cabling. The big question remaining for me is whether the Reactor running from a Schmidt dynamo hub will charge a cell phone with active GPS, as the GPS function draws a lot more current. Peter White thinks not, though he doesn’t talk about the Reactor. If it’s a problem I should be able to optimize the GPS code to draw less current (by reducing accuracy and/or turning the GPS off between fixes).
That would be Mr. Bike Hermit, Sir to you Kurt
Aye Aye, Capt. Bike Hermit!
Hi Ryan. Can you recommend a good light to go with the hub and reactor installation…I mainly charge a battery brick then charge off or that at night for the following day.
thanks
patrick
Howdy, Patrick! Thanks for reading and the question. Just about any modern LED headlight should work fine. Mine is an older Supernova E3 Pro. If I had it to do over again and had the money, I’d go for the Schmidt Edelux, mostly for aesthetic reasons.
Cheers,
Ryan
The Luxos U actually makes no sense since you have the charger…oops. Delete my comments if you want.
I’ve got about a week on my Reactor with Edelux II, works great so far. I don’t generally run a load on the Reactor while the light is on but it seemed to handle it when I tried it briefly.
Can you charge your Garmin while using the Garmin? I currently (no pun intended) run a Busch and Muller Luxos that has a headlight and a usb charger; when charging my Garmin 500, it terminates the ride if I stop at traffic lights. I’m thinking of switching to a Reactor for a different reason (a leak somewhere causes the light to turn on when it’s raining, not always what I want) but wonder if it will solve my charging problem too.
Thanks, that was a great set of instructions.
Howdy, Dave! I doubt switching to the Reactor will solve your charging problem. It sounds like a Garmin issue to me. Thanks for reading!
-Ryan
I’m confused. You never told us what to do with the coffee? 🙂
Thanks for the thorough guide! I hope SineWave is kicking you some rebate $$!
“Does your steerer tube have an opening at the bottom?:
No, it doesn’t. Would using the Supernova “expander” plug (or suitably modified compression plug) be a workaround for this problem?
Howdy, John!
The reason your steerer needs to be open at the bottom (on the underside of the fork crown) is so that the wires can pass through on their way to your dynamo. Using a pass-through expander plug rather than a star nut will have no impact on this situation since the wires’ path will still be blocked at the bottom of the steerer. You’ll need to drill a hole in the bottom of the steerer (which may void your warranty and is certainly NOT recommended for carbon steerers/crowns) or look into other charging options. Hopefully this makes sense and answers your question. Thanks for reading!
-Ryan